Facebook Messenger
- Installation & Setup
- Supported Features
- Sending Facebook Templates
- Supported Events
- Optin and Referral Events
- Built-in Natural Language Processing
- Studio Features
Facebook Messenger is the biggest Messenger out there and therefor a great choice for building a chatbot. There are more than 1 Billion active users per month.
{callout-video} Visual learner? Take a look at the BuildAChatbot Facebook Tutorial
Installation & Setup
First you need to pull in the Facebook Driver.
composer require botman/driver-facebook
Then load the driver before creating the BotMan instance (only when you don't use BotMan Studio):
DriverManager::loadDriver(\BotMan\Drivers\Facebook\FacebookDriver::class);

// Create BotMan instance
BotManFactory::create($config);
Or if you use BotMan Studio:
php artisan botman:install-driver facebook
Next you need to add to your .env file the following entries (only if you're using BotMan Studio):
FACEBOOK_TOKEN=your-facebook-page-token
FACEBOOK_VERIFICATION=your-facebook-verification-token
FACEBOOK_APP_SECRET=your-facebook-app-secret
This driver requires a valid and secure URL in order to set up webhooks and receive events and information from the chat users. This means your application should be accessible through an HTTPS URL.
{callout-info} ngrok is a great tool to create such a public HTTPS URL for your local application. If you use Laravel Valet, you can create it with "valet share" as well.
To connect BotMan with Facebook Messenger, you first need to follow the official quick start guide to create your Facebook Messenger application and retrieve an access token as well as an app secret. Switch both of them with the dummy values in your BotMan .env file.
If you don't use BotMan Studio, add these lines to the $config array that you pass when you create the object from BotManFactory.
'facebook' => [
  	'token' => 'YOUR-FACEBOOK-PAGE-TOKEN-HERE',
	'app_secret' => 'YOUR-FACEBOOK-APP-SECRET-HERE',
    'verification'=>'MY_SECRET_VERIFICATION_TOKEN',
]
After that you can setup the webhook, which connects the Facebook application with your BotMan application. This is covered in the above mentioned Quick Start Guide as well, as connecting your Facebook application to a Facebook page.
Supported Features
This is a list of features that the driver supports. If a driver does not support a specific action, it is in most cases a limitation from the messaging service - not BotMan.
| Feature | Supported? |
|---|---|
| Question Buttons | ✅ |
| Image Attachment | ✅ |
| Video Attachment | ✅ |
| Audio Attachment | ✅ |
| Location Attachment | ✅ |
Sending Facebook Templates
BotMan supports all the main Facebook templates like Button, Generic, List, Receipt, OpenGraph and Airline. All of them are available through an expressive and easy API.
{callout-info} Facebook is still experimenting a lot with its Messenger features. This is why some of them behave differently on certain platforms. General it is easy to say that all of them work within the native Messenger on your phones. But e.g. the List Template cover image is not working inside the Facebook website chat and the online Messenger.
Button Template
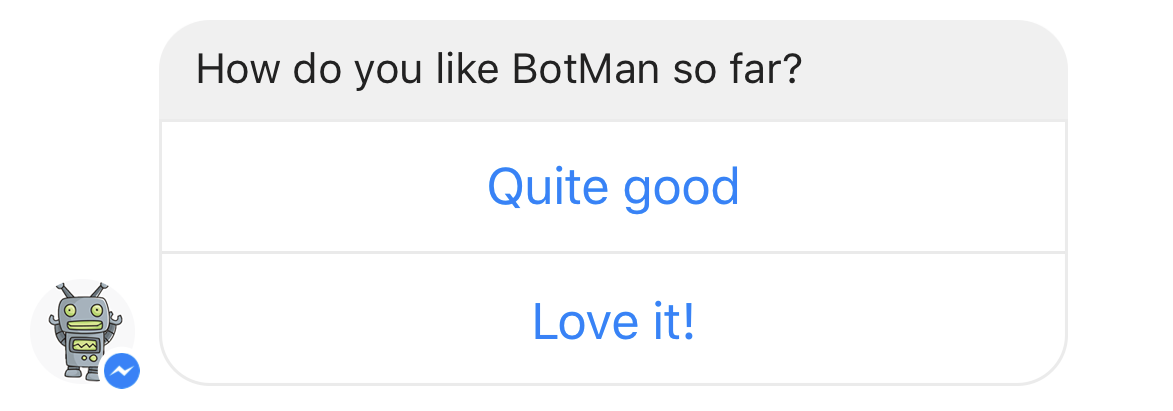
A Button Template is a text with several user input options. (buttons) The template uses ElementButtons which are different from the buttons you use for BotMan Questions. There are two types of ElementButtons. The default one is the web_url button which only needs an url next to the title. It links to an external website. Secondly we have postback buttons. They will trigger Facebook postback actions. They require the type postback and a payload which is the text that Facebook will send to BotMan when a user hits this button. If you use the ask method within a Conversation, you will be able to get the postback button's text with $answer->getText().
$bot->reply(ButtonTemplate::create('Do you want to know more about BotMan?')
	->addButton(ElementButton::create('Tell me more')
	    ->type('postback')
	    ->payload('tellmemore')
	)
	->addButton(ElementButton::create('Show me the docs')
	    ->url('http://botman.io/')
	)
);
Generic Template

A Generic Template is a horizontal scrollable carousel of elements. Every element requires at least a title which is provided through the static create method. Additionally it can have a subtitle, image and buttons.
$bot->reply(GenericTemplate::create()
    ->addImageAspectRatio(GenericTemplate::RATIO_SQUARE)
    ->addElements([
        Element::create('BotMan Documentation')
            ->subtitle('All about BotMan')
            ->image('http://botman.io/img/botman-body.png')
            ->addButton(ElementButton::create('visit')
                ->url('http://botman.io')
            )
            ->addButton(ElementButton::create('tell me more')
                ->payload('tellmemore')
                ->type('postback')
            ),
        Element::create('BotMan Laravel Starter')
            ->subtitle('This is the best way to start with Laravel and BotMan')
            ->image('http://botman.io/img/botman-body.png')
            ->addButton(ElementButton::create('visit')
                ->url('https://github.com/mpociot/botman-laravel-starter')
            ),
    ])
);
List Template
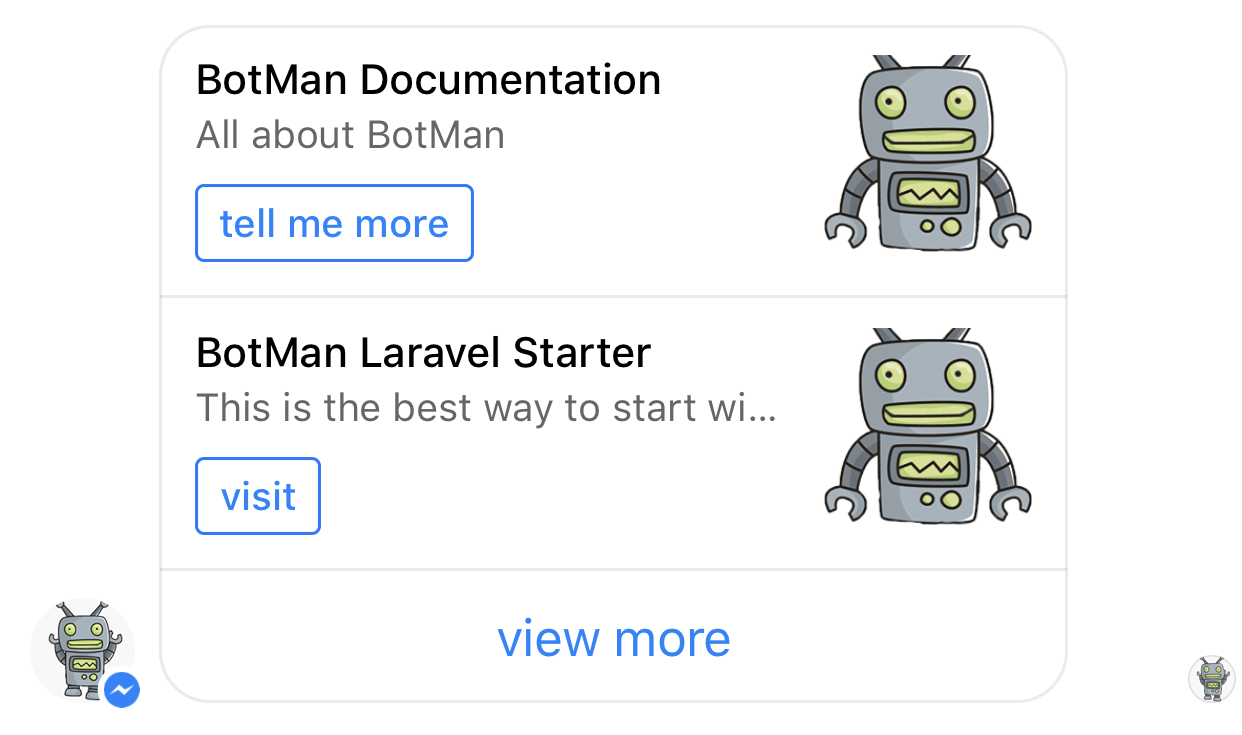
The List Template is a template that allows you to present a set of elements vertically. The default list will set the first element as a cover image. If you don't want a cover image call the useCompactView() method. Additionally to the elements your list can have one global button too. This is when you need the addGlobalButton(...) method.
$bot->reply(ListTemplate::create()
    ->useCompactView()
    ->addGlobalButton(ElementButton::create('view more')
        ->url('http://test.at')
    )
    ->addElement(Element::create('BotMan Documentation')
        ->subtitle('All about BotMan')
        ->image('http://botman.io/img/botman-body.png')
        ->addButton(ElementButton::create('tell me more')
            ->payload('tellmemore')
            ->type('postback')
        )
    )
    ->addElement(Element::create('BotMan Laravel Starter')
        ->subtitle('This is the best way to start with Laravel and BotMan')
        ->image('http://botman.io/img/botman-body.png')
        ->addButton(ElementButton::create('visit')
            ->url('https://github.com/mpociot/botman-laravel-starter')
        )
    )
);
Receipt Template
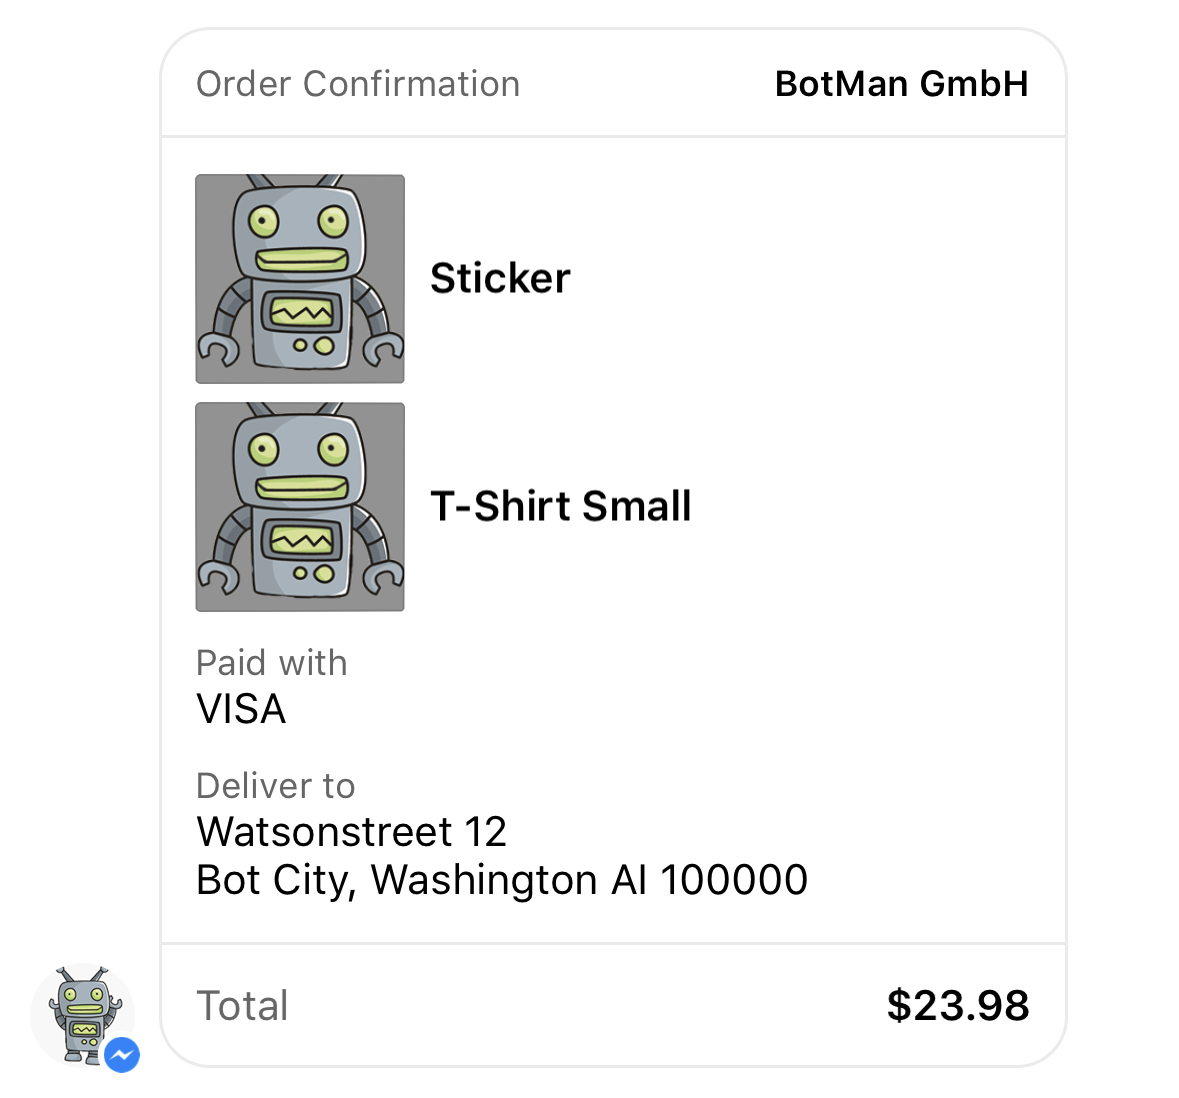
Use the Receipt Template to send a order confirmation, with the transaction summary and description for each element. This template differs a lot from the others. This is why there are custom ReceiptElements and lots of other custom fields. Checkout the official Facebook documentation and the example below to see all the possibilities. In your Messenger you can click the template to see all of the information.
$bot->reply(ReceiptTemplate::create()
    ->recipientName('Christoph Rumpel')
    ->merchantName('BotMan GmbH')
    ->orderNumber('342343434343')
    ->timestamp('1428444852')
    ->orderUrl('http://test.at')
    ->currency('USD')
    ->paymentMethod('VISA')
    ->addElement(ReceiptElement::create('T-Shirt Small')
        ->price(15.99)
        ->image('http://botman.io/img/botman-body.png')
    )
    ->addElement(ReceiptElement::create('Sticker')
        ->price(2.99)
        ->image('http://botman.io/img/botman-body.png')
    )
    ->addAddress(ReceiptAddress::create()
        ->street1('Watsonstreet 12')
        ->city('Bot City')
        ->postalCode(100000)
        ->state('Washington AI')
        ->country('Botmanland')
    )
    ->addSummary(ReceiptSummary::create()
        ->subtotal(18.98)
        ->shippingCost(10 )
        ->totalTax(15)
        ->totalCost(23.98)
    )
    ->addAdjustment(ReceiptAdjustment::create('Laravel Bonus')
        ->amount(5)
    )
);
Media Template
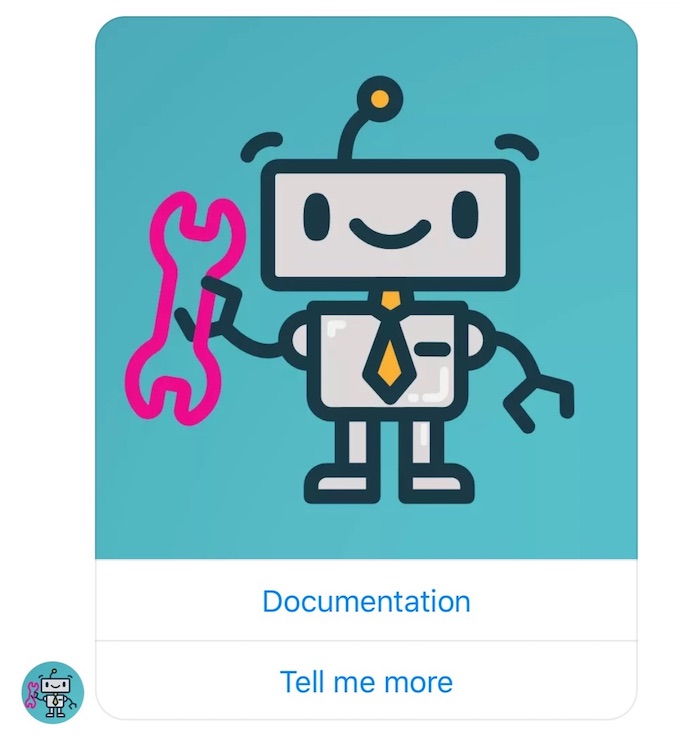
You can use the Media Template to send images or videos with optional buttons. Here is an example on how to send an image with an attachment ID.
$bot->reply(MediaTemplate::create()
    ->element(MediaAttachmentElement::create('image')
        ->attachmentId('1543527005693234')
        ->addButton(ElementButton::create('Tell me more')
            ->type('postback')
            ->payload('Tell me more')
        )
        ->addButton(ElementButton::create('Documentation')
            ->url('https://botman.io/')
        )
    )
);
And here is an example on how to send a video.
$bot->reply(MediaTemplate::create()
    ->element(MediaUrlElement::create('video')
        ->url('https://www.facebook.com/liechteneckers/videos/10155225087428922/')
        ->addButtons([
            ElementButton::create('Web URL')->url('http://liechtenecker.at'),
            ElementButton::create('payload')->type('postback')->payload('test'),
        ])
    )
);
You probably have noticed that the main Template is the same for images or videos. (MediaTemplate) With the element you decide the attachment type. But you also decide if you send the attachment with the attachment ID or an Facebook URL. Checkout the official Facebook documentation for more information.
OpenGraph Template
You can use the OpenGraph Template to send a structured message with an open graph url and a button (optional).
$bot->reply(OpenGraphTemplate::create()
    ->addElement(OpenGraphElement::create()->url('https://example.com'))
    ->addElements([
        OpenGraphElement::create()->url('https://example.com'),
        OpenGraphElement::create()->url('https://example.com'),
    ])
);
AirlineBoardingPass Template
You can use the AirlineBoardingPass Template to send boarding pass with travel's details (flight number, departure airport, arrival airport, flight schedule).
$bot->reply(
    AirlineBoardingPassTemplate::create(
        'You are checked in.',
        'en_US',
        [
            AirlineBoardingPass::create(
                'Jones Farbound',
                'CG4X7U',
                'https://www.example.com/en/logo.png',
                'M1JONES FARBOUND  CG4X7U nawouehgawgnapwi3jfa0wfh',
                'https://www.example.com/en/PLAT.png',
                AirlineFlightInfo::create(
                    'c001',
                    AirlineAirport::create('SFO', 'San Francisco'),
                    AirlineAirport::create('SLC', 'Salt Lake City'),
                    AirlineFlightSchedule::create('2016-01-02T19:45')
                )
            ),
        ]
    )
    ->themeColor('#FF0000')
);
AirlineCheckInTemplate Template
You can use the AirlineCheckIn Template to send check in informations (flight number, departure airport, arrival airport, flight schedule).
$bot->reply(
    AirlineCheckInTemplate::create(
        'Check-in is available now.',
        'en_US',
        'ABCDEF',
        [
            AirlineFlightInfo::create(
                'c001',
                AirlineAirport::create('SFO', 'San Francisco'),
                AirlineAirport::create('SLC', 'Salt Lake City'),
                AirlineFlightSchedule::create('2016-01-02T19:45')
            ),
        ],
        'https://www.airline.com/check-in'
    )
    ->themeColor('#FF0000')
);
AirlineItinerary Template
You can use the AirlineItinerary Template to send flight itinerary's details (passengers information, flight details).
$bot->reply(
    AirlineItineraryTemplate::create(
        'Here\'s your flight itinerary.',
        'en_US',
        'ABCDEF',
        [
            AirlinePassengerInfo::create('p001', 'Farbound Smith Jr'),
        ],
        [
            AirlineExtendedFlightInfo::create(
                'c001',
                's001',
                'KL9123',
                AirlineAirport::create('SFO', 'San Francisco'),
                AirlineAirport::create('SLC', 'Salt Lake City'),
                AirlineFlightSchedule::create('2016-01-02T19:45'),
                Airline::TRAVEL_TYPE_FIRST_CLASS
            ),
        ],
        [
            AirlinePassengerSegmentInfo::create('s001', 'p001', '12A', 'Business'),
        ],
        '14003',
        'USD'
    )
    ->themeColor('#FF0000')
    ->addPriceInfo('Fuel surcharge', '1597', 'USD')
    ->basePrice('12206')
    ->tax('200')
);
AirlineUpdate Template
You can use the AirlineUpdate Template to send an update regarding a flight (reason, updated flight informations).
$bot->reply(
    AirlineUpdateTemplate::create(
        Airline::UPDATE_TYPE_DELAY,
        'en_US',
        'CF23G2',
        AirlineFlightInfo::create(
            'c001',
            AirlineAirport::create('SFO', 'San Francisco'),
            AirlineAirport::create('SLC', 'Salt Lake City'),
            AirlineFlightSchedule::create('2016-01-02T19:45')
        )
    )
    ->themeColor('#FF0000')
    ->introMessage('Your flight is delayed')
);
Supported Events
The BotMan Facebook driver supports listening for the following events:
- messaging_checkout_updates
- messaging_deliveries
- messaging_optins
- messaging_reads
- messaging_referrals
Optin and Referral Events
To react to Optin or Referral events, use the following event syntax:
$botman->on('messaging_referrals', function($payload, $bot) {

});

$botman->on('messaging_optins', function($payload, $bot) {

});
You can find more details about M.me Links in the official documentation.
Built-in Natural Language Processing
Facebook Messenger comes with an integrated Natural Language Processing tool that you can enable for your Facebook page, if you want.
Whenever a message contains one or more natural language processing entities that Facebook knows - such as greetings, datetimes or saying goodbye - the message will contain an extra array called "nlp".
You may access this array using the getExtras method on the incoming message object like this:
$entities = $message->getExtras('nlp');
If there are no NLP entities added to the message, this method will return NULL. You can take a look at the official Facebook NLP documentation to find out more about Facebook NLP entities and how they are structured.
Studio Features
Get Started Command
Adding a Get Started button resolves the issue of users not knowing what to write to break the ice with your bot. It is displayed the first time the user interacts with a Facebook chatbot. When you click it, it will send a payload (text) to BotMan and you can react to it and send the first welcome message to the user and tell him how to use your bot. In order to define this payload you need to send a CURL with some data to Facebook. But BotMan Studio can do that for you too!
First define the payload text in your config/botman/facebook.php file.
'start_button_payload' => 'YOUR_PAYLOAD_TEXT'
Then run the artisan command:
php artisan botman:facebook:AddStartButton
This will add the Get Started button to your page's chat. You are now able to listen to this button with the payload in your hears method.
$botman->hears('YOUR_PAYLOAD_TEXT', function (BotMan $bot) {
	...
});
Greeting Text Command
The Facebook Greeting text is shown on the welcome screen when a user interacts with your bot the first time. (like the Get Started Button)
Define this text in your config/botman/facebook.php file. Then use the Artisan command to trigger the command:
php artisan botman:facebook:AddGreetingText
Persistent Menu Command
With BotMan Studio it now gets much easier to add a Persistent Facebook Menu to your bot. First define the structure and types of your menu in your config/botman/facebook.php file. There you will find a persistent_menu demo menu payload. Just edit it to your needs.
Then use the Artisan command to trigger the command:
php artisan botman:facebook:AddMenu
Whitelist Domains Command
Some features like Messenger Extensions and Checkbox Plugin require a bot to specify a domain whitelist.
Define all domains in your config/botman/facebook.php file. Then use the Artisan command to trigger the command:
php artisan botman:facebook:whitelistDomains
Configure Natural Language Processing
Facebook Messenger comes with an integrated Natural Language Processing tool that you can enable or disable using the BotMan Studio command.
php artisan botman:facebook:nlp
If you want to disable the NLP feature for your Facebook page, you may use the --disable option:
php artisan botman:facebook:nlp --disable